How to Create a Cheese Platter
A beautiful cheese platter doesn’t require a specialty shop, expensive ingredients, or advanced skills. What it does require is a simple formula, a clear build order, and a few intentional details that make the board feel abundant and elevated.
Whether you’re hosting a wine night, setting out appetizers before dinner, or creating a board “just because,” this guide walks you through exactly what to buy, how much you need, and how to assemble it step by step—so your cheese platter looks effortless every single time.
When to Serve a Cheese Platter
A cheese platter is one of the most versatile things you can serve. It works across seasons, times of day, and styles of gatherings.
A cheese platter is perfect for:
- Wine nights with friends
- Pre-dinner appetizers or cocktail hour
- Brunches, showers, and daytime celebrations
- Casual entertaining when you don’t want to cook
- A light supper paired with wine and fruit
Because cheese boards are lighter and simpler than meat-forward boards, they’re ideal when you want something elegant, unfussy, and designed for lingering.

Cheese Board vs. Charcuterie Board: What’s the Difference?
These terms are often used interchangeably, but they serve slightly different purposes.
Cheese Board
- Focuses primarily on cheese
- Includes fruits, nuts, crackers, and spreads
- Lighter and more versatile
- Ideal for daytime events, wine nights, and casual entertaining
Charcuterie Board
- Centers around cured meats
- Cheese plays a supporting role
- Heartier and more filling
- Best for evenings, holidays, or meal-style boards
Think of it this way:
A cheese board is elegant and approachable. A charcuterie board is bold and abundant.
If you’re looking for a heartier, seasonal option, be sure to explore my Fall Charcuterie Board, which is perfect for cozy gatherings and autumn entertaining.


More Recipes You’ll Love

Build a Board Worth Celebrating
How To Make The Perfect Caviar Board
Obsessed with creating the perfect spread? Take your hosting game even further with How to Make the Perfect Caviar Board. It’s an elegant, elevated twist that pairs beautifully with your go-to cheese platter—ideal for impressing guests or indulging in something special at home.
Go for a Sweet Board Upgrade
How To Make an Epic Mini Cheesecake Board
Take things in a sweeter direction with How To Make an Epic Mini Cheesecake Board. It’s a fun, indulgent twist that turns your spread into a dessert centerpiece everyone will love.

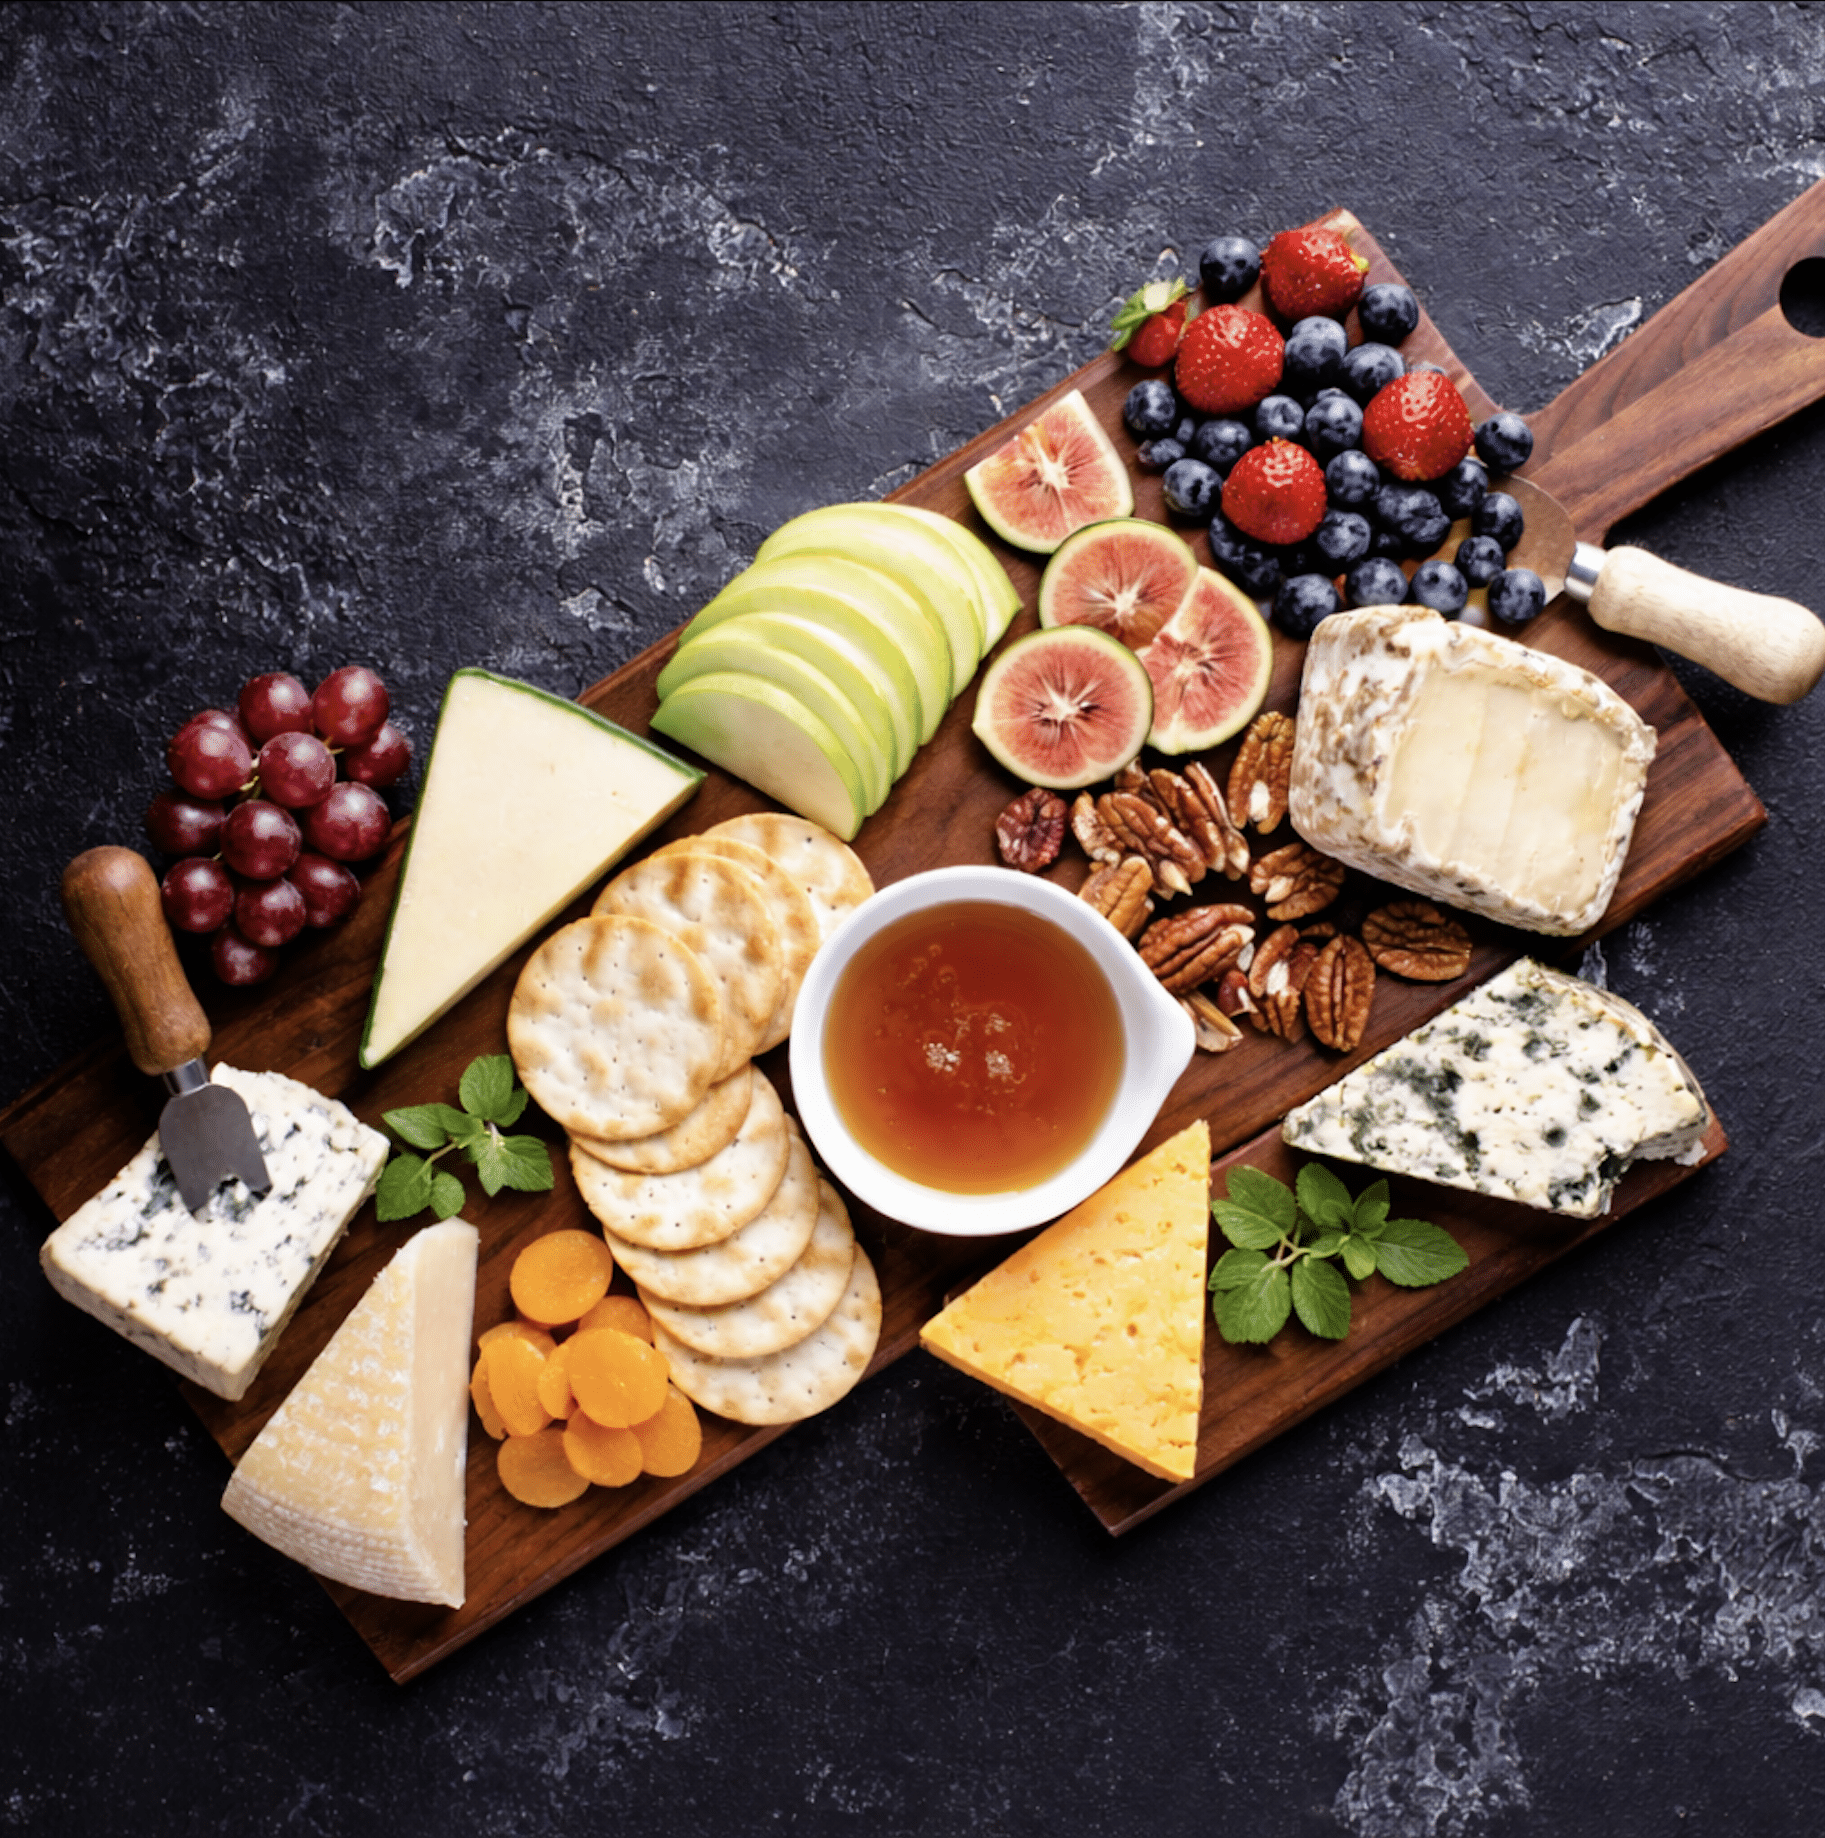
Step 1: Choose the Right Cheese (Use This Foolproof Formula)
The biggest mistake people make is buying random cheeses. The secret to a great cheese platter is variety, not volume.
The Cheese Formula (3–5 Cheeses)
Choose:
- 1 Soft cheese (Brie, Camembert, goat cheese)
- 1 Semi-soft cheese (Havarti, Fontina, Gouda)
- 1 Hard or aged cheese (Aged cheddar, Parmesan, Manchego)
- 1 Bold “wild card” cheese (Blue cheese, smoked cheese, herb-crusted chèvre)
- Optional 5th cheese: Something fun (truffle cheese, wine-soaked, peppered)
This mix gives you contrast in texture, flavor, color, and aroma, which is what makes a board interesting.
Where to Shop for Cheese
I love sourcing cheeses from trusted brands like Jarlsberg, Murray’s Cheese, and CalyRoad Creamery. You can find excellent options at Whole Foods Market, Kroger, or your local farmer’s market.
Tip: Don’t be intimidated by the cheese counter. Ask questions and sample—confidence comes from tasting.

Step 2: Add the “Board Friends” (This Is What Makes It Look Full)
Cheese never stands alone. A great board balances salty, sweet, crunchy, and fresh.
Choose 2 from each category:
Crunch: crackers, crostini, pretzel crisps
Salty: olives, cornichons, marinated vegetables
Sweet: honey, fig jam, pepper jelly
Fresh fruit: grapes, berries, apples, pears, figs
Dried fruit: dates, apricots, cranberries
Nuts: almonds, pistachios, pecans
Optional meat: prosciutto, salami, soppressata
Finishing touches: fresh herbs or edible flowers

Step 3: Know How Much to Serve
This removes guesswork instantly.
- Appetizer platter: 1–2 oz cheese per person
- Meal-style board: 3–4 oz cheese per person
Shortcut: For 6 guests, aim for 3–4 cheeses plus plenty of fruit and crackers.
The Step-by-Step Cheese Board Build (Visual Guide)
Follow this order exactly and your board will look styled—not scattered.
Step 4: Choose the Board + Bowls First

Before adding food, choose:
- One large board (wood, marble, or slate)
- 2–4 small bowls for honey, jam, olives, or nuts
Bowls act as visual anchors and keep the board from looking flat.
Step 5: Bring Cheese to Room Temperature
Remove cheese from the refrigerator at least 60 minutes before serving.

Room-temperature cheese:
- Tastes better
- Slices cleaner
- Has better texture
This step alone elevates the experience.
Step 6: Place the Bowls

Arrange bowls first:
- Space them out in a loose triangle or zig-zag
- Avoid lining them up
- Keep them near the edges for easy scooping
Step 7: Place the Cheeses

Now add the cheeses:
- Space them evenly around the board
- Alternate light and dark cheeses for contrast
- Mix shapes: wedges, logs, blocks, crumbles
Use odd numbers when possible—3 or 5 cheeses looks best.
Step 8: Slice Strategically
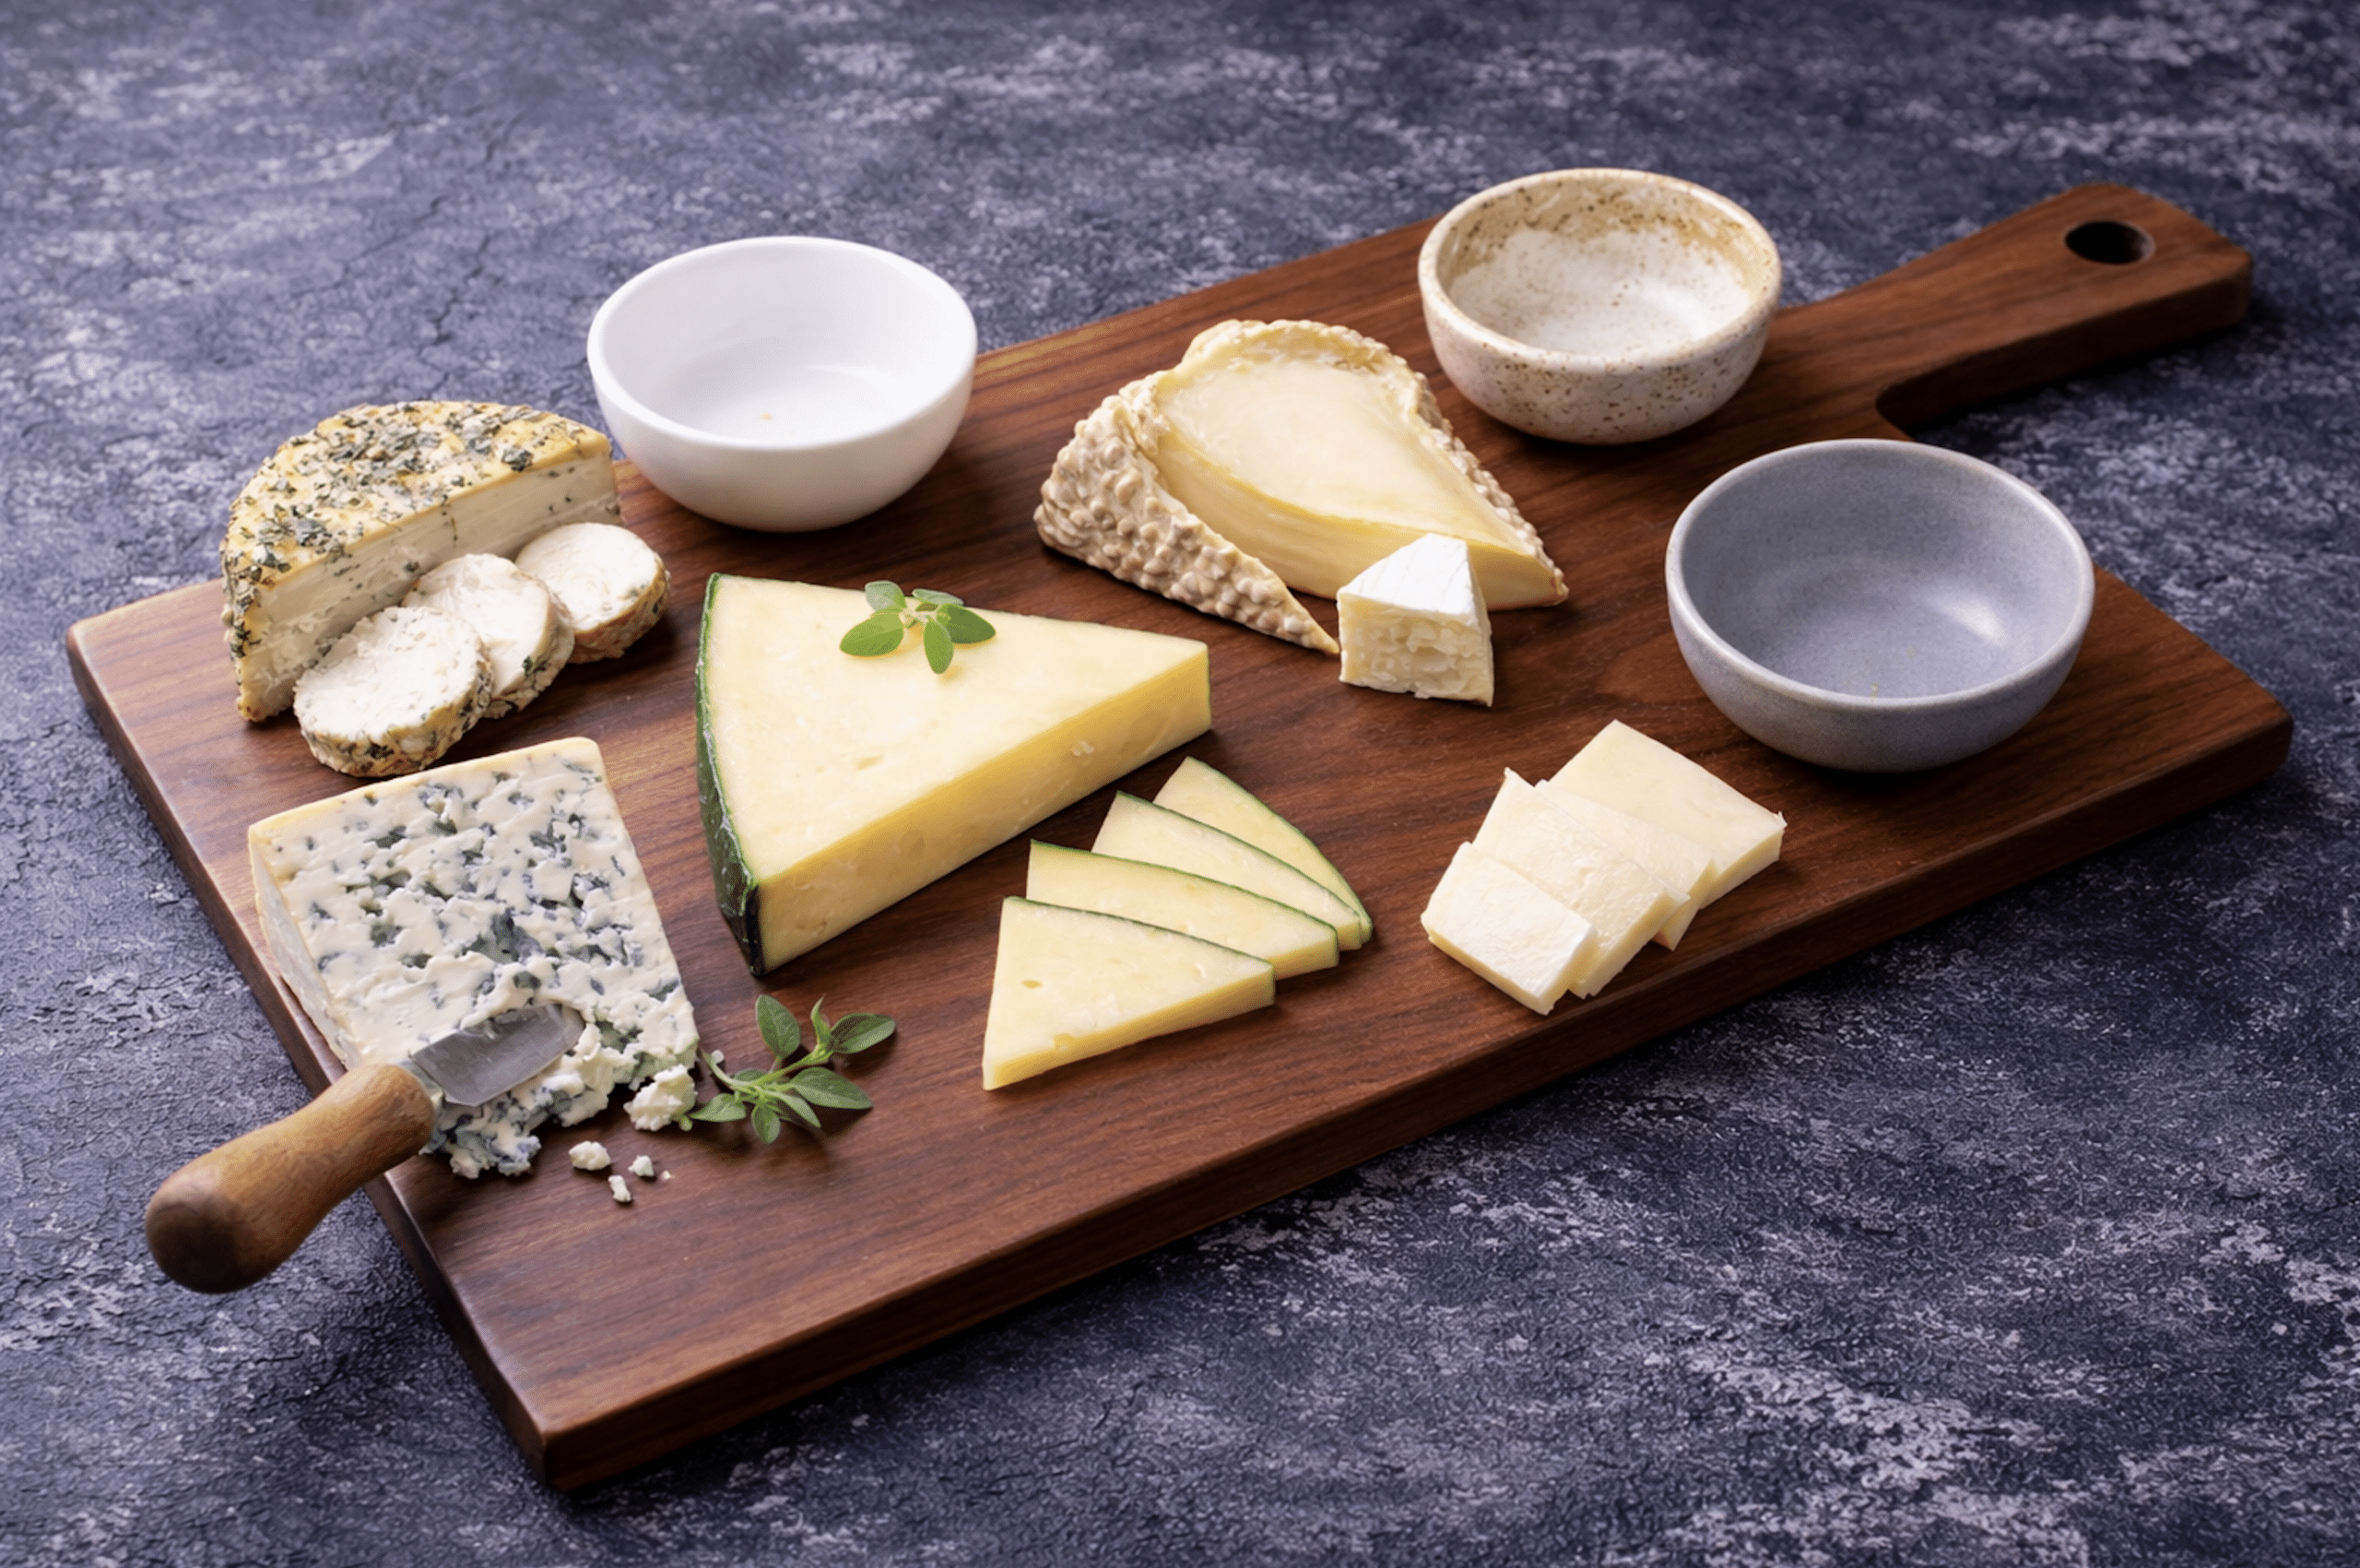
Slice some, not all:
- Hard cheeses: thin slices or triangles
- Semi-soft: rectangles or fans
- Brie: slice one wedge to show guests how
- Goat cheese: rounds or left whole
- Blue cheese: leave as a wedge with a knife
Step 9: Add Crackers and Crostini

Cluster crackers in 2–3 areas:
- Fan them outward
- Keep them away from wet items
They add volume quickly and frame the board beautifully.
Step 10: Fill in Savory Items

Add olives, nuts, pickles, and meats:
- Messy items go in bowls
- Nestle everything into open spaces
Step 11: Add Sweet + Fruit
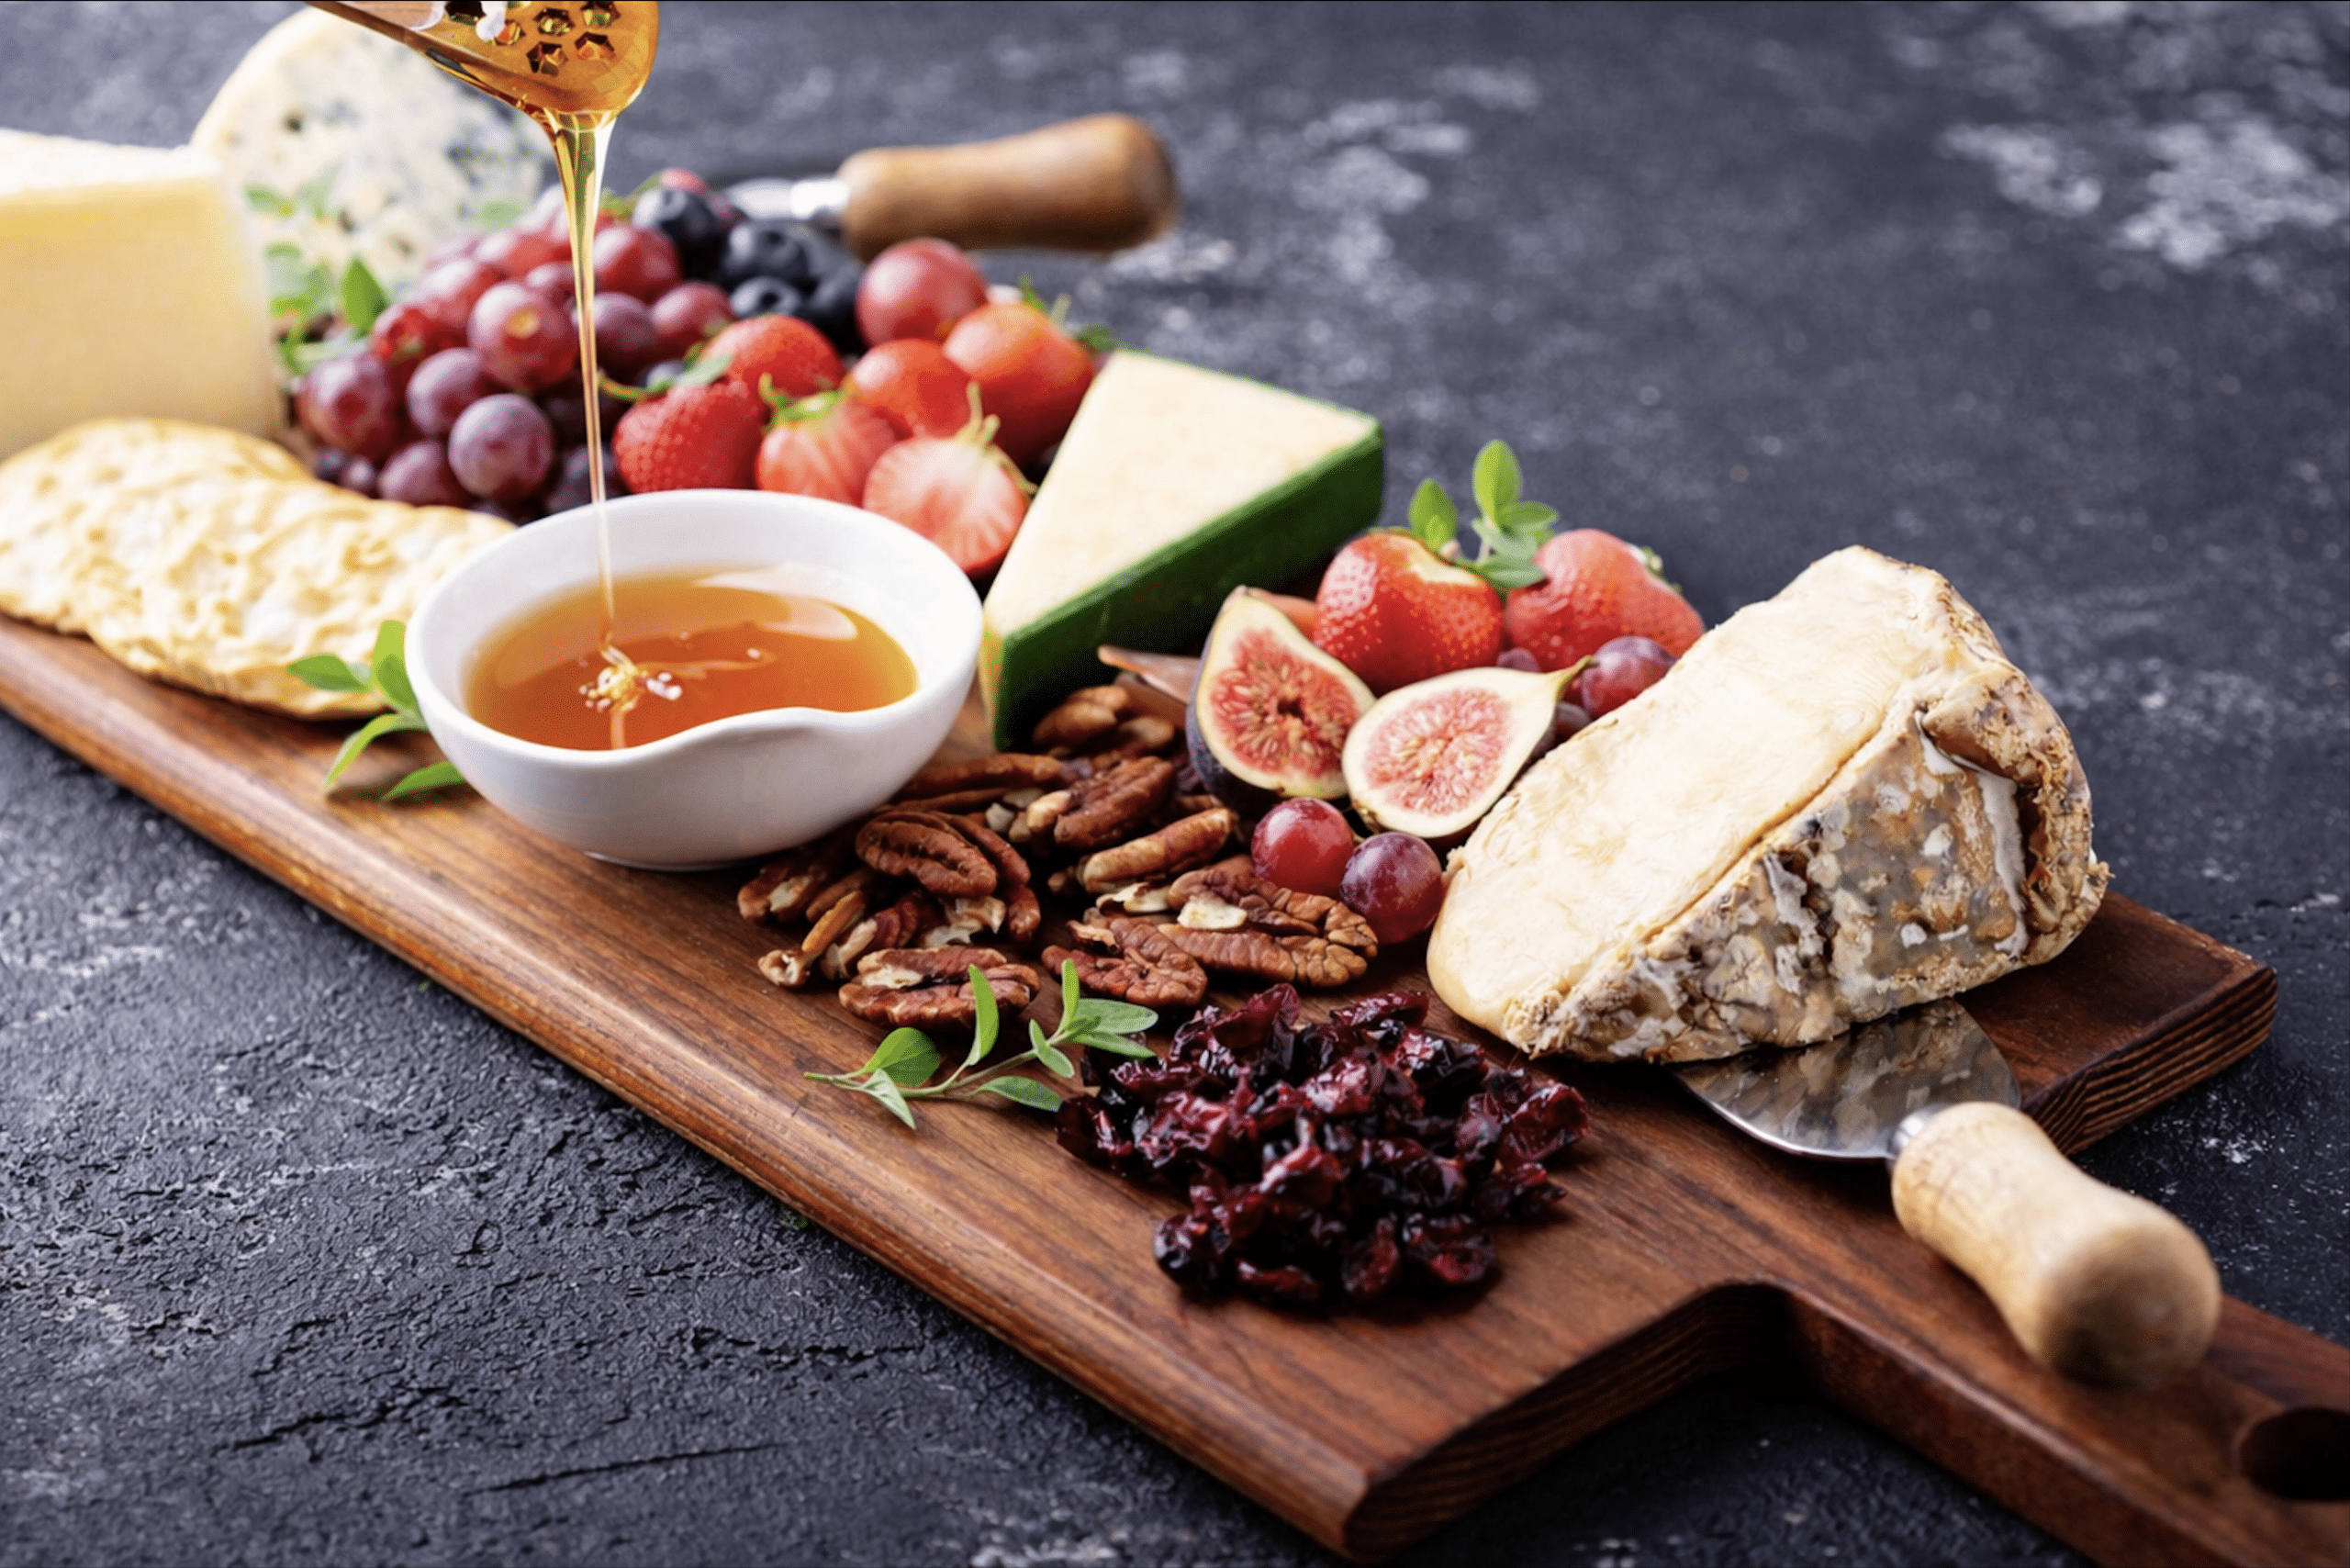
This is where the board comes alive:
- Grapes in small bunches
- Berries tucked into corners
- Apples or pears sliced thin
- Figs halved for drama
Step 12: Finish Like a Stylist

In the final minute:
- Add fresh herbs
- Wipe the board edges clean
- Make sure each cheese has a knife
Wine Pairings for a Cheese Platter
If you’re serving one bottle, choose something versatile.

Hosting tip: Sparkling wine is always the safest crowd-pleaser.
Shop My Cheese Board Essentials (Top 3)

Large Wooden or Marble Cheese Board
A generous board gives you room to create spacing, layers, and visual flow—key to an elevated look.

Small Ramekins or Pinch Bowls
These are the secret weapon. They hold spreads neatly and create structure across the board.
KEEP HOSTING
Round out your cheese platter with a warm baked starter, a bright cocktail to pour alongside, and a guide to pulling the whole gathering together.
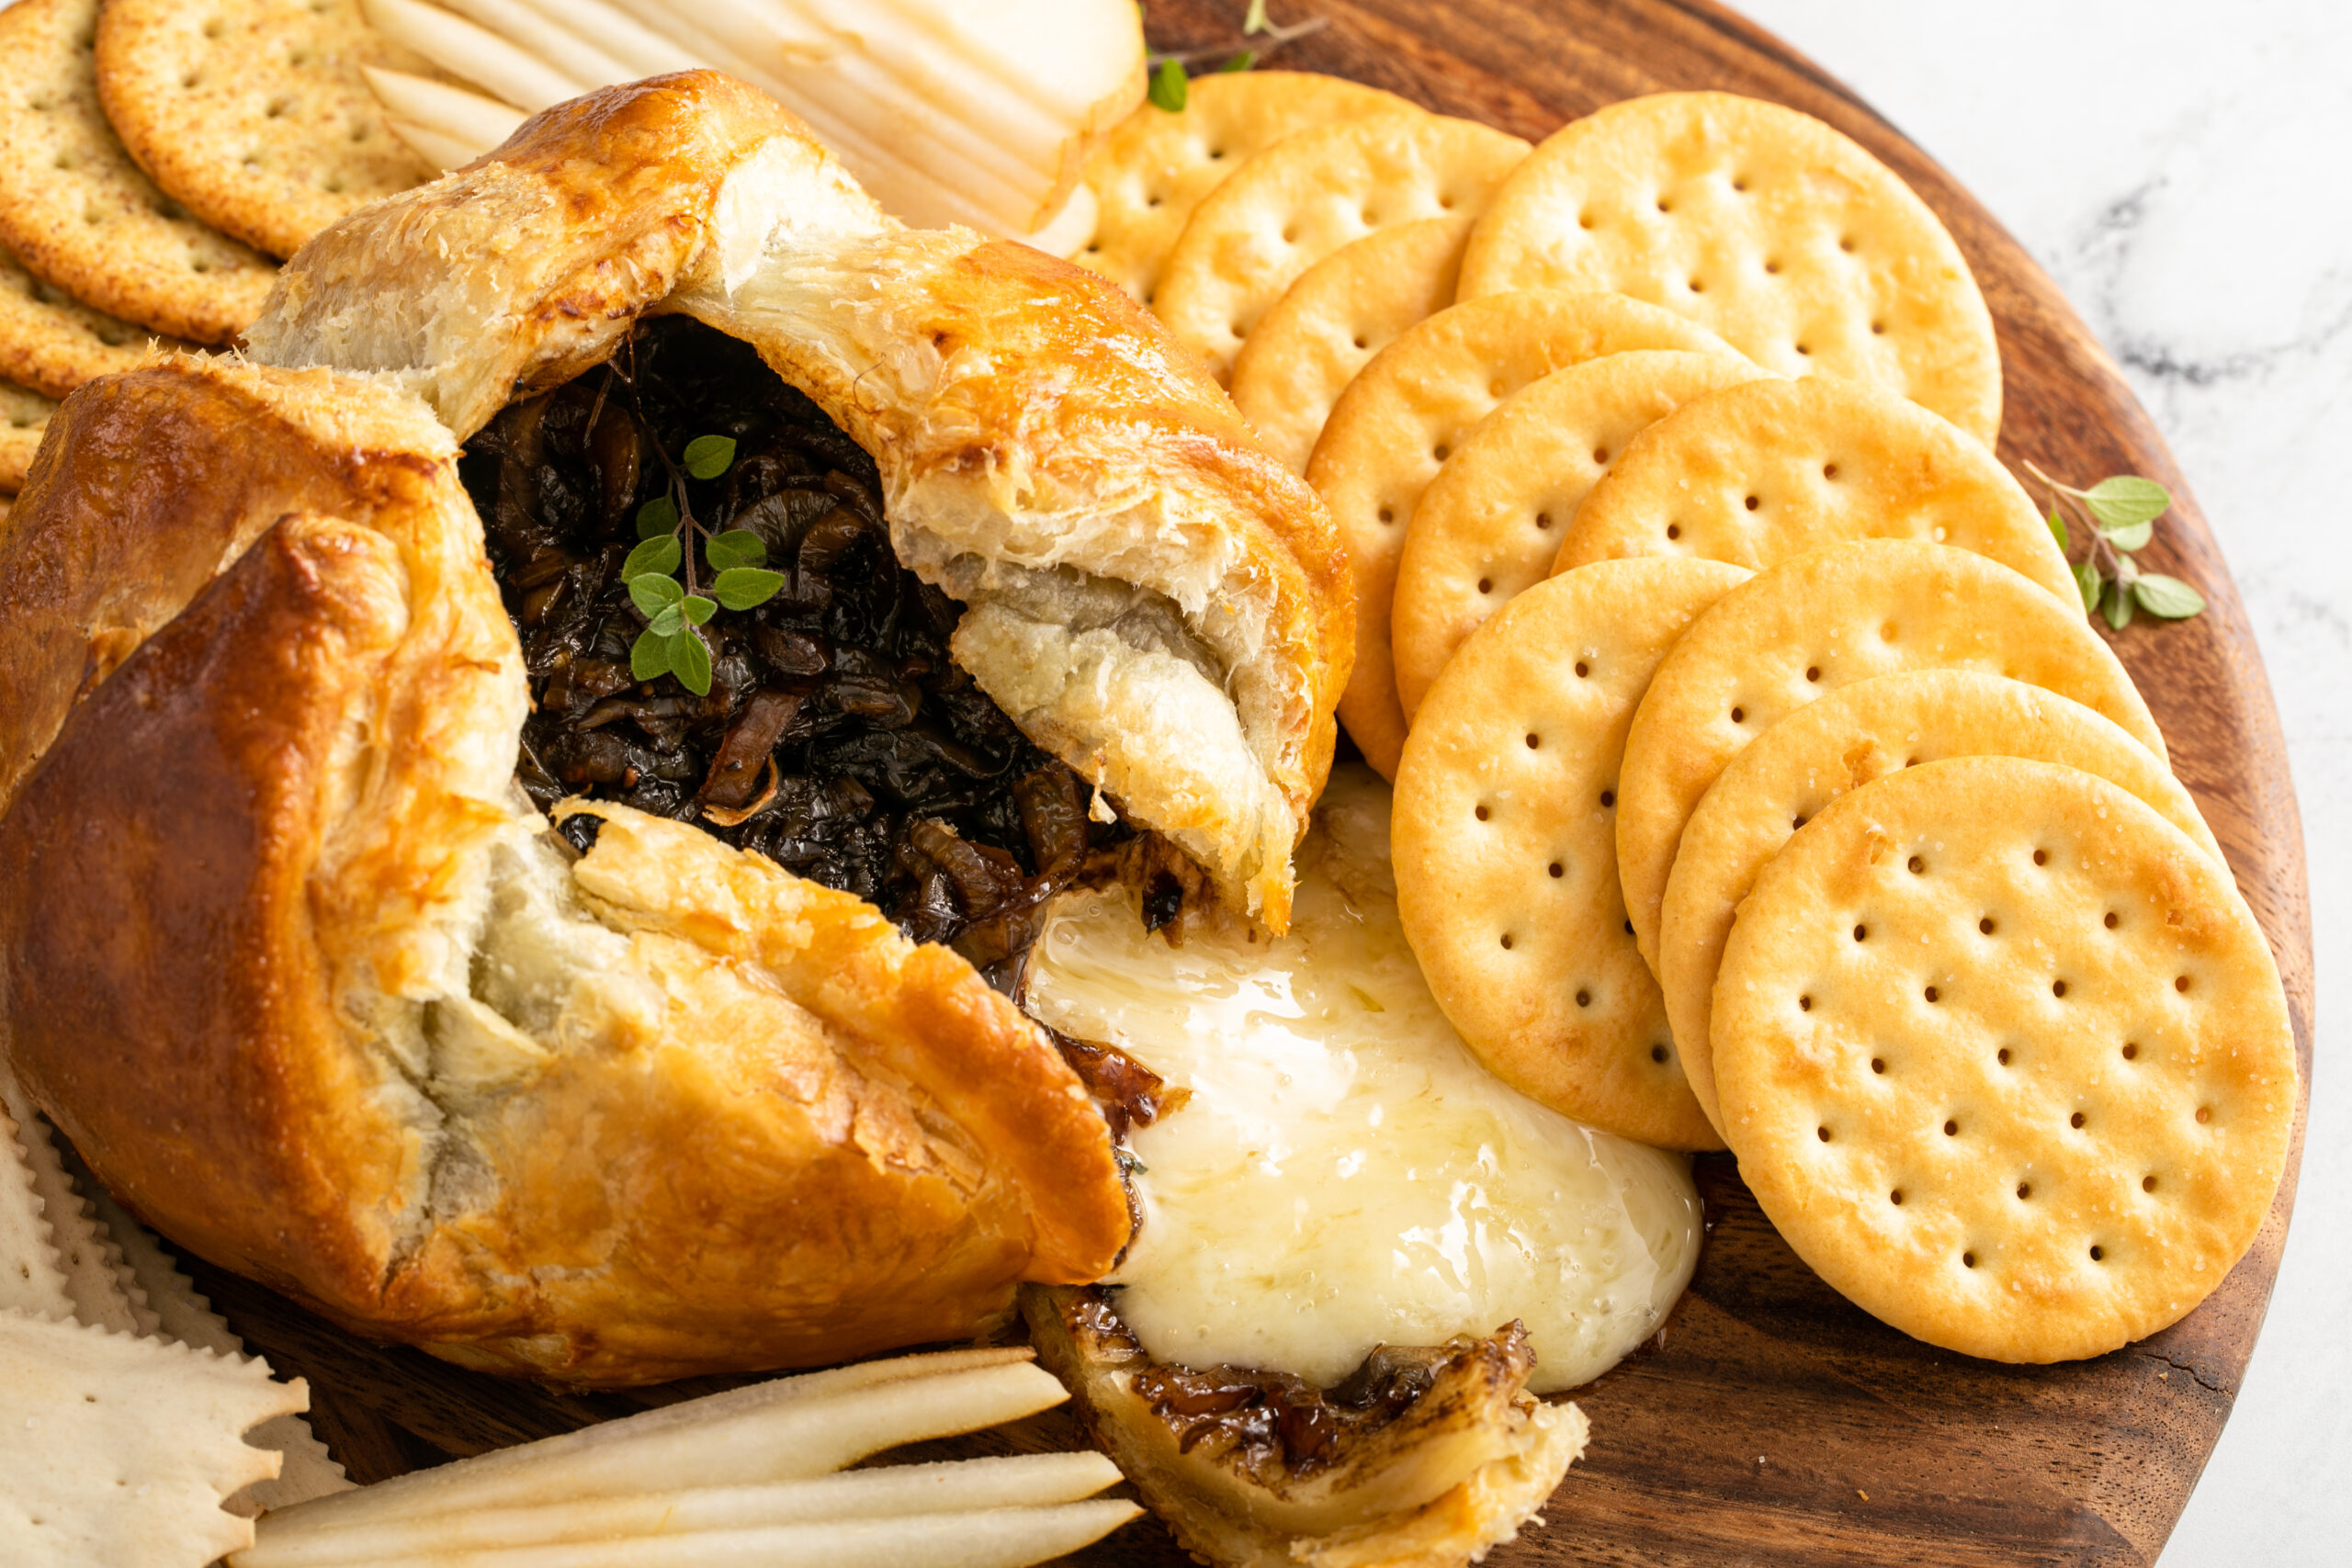
Baked Brie With Balsamic Caramelized Onions
A molten, golden centerpiece that belongs on every cheese spread — sweet, savory, and impossibly easy.
Get the Recipe →
Grapefruit Rosemary Cocktail
Bright citrus and fragrant rosemary make this the perfect refreshing sip to set beside a board of cheeses.
Pour a Glass →
How To Host A Fabulous Brunch At Home
From timing to table styling, here’s how to turn your spread into a relaxed, memorable gathering.
Keep Reading →Final Thought
A great cheese platter isn’t about perfection. It’s about balance, generosity, and creating a reason for people to linger.
Pour a glass of wine. Invite someone over. Or make the board just for yourself. Cheese boards are meant to be enjoyed slowly.